

To really customize your Samsung Galaxy S3, you'll need to be rooted, because most of the coolest mods and hacks require root access. If you haven't rooted yet, you're just barely touching the surface of what your GS3 can do for you.
However, if you've never rooted before, it can be pretty intimidating. As far as instructions goes, there's plenty available, like Danny's guide on using ODIN for Windows or the easy CASUAL method that Faisal provided.
There's only one problem. If you're like me and mostly use a Mac, it's not as easy, since most rooting guides use Windows. The CASUAL method does supposedly support Macs, but I initially tried that with no success. I did find another way, though, and that's what I'm going to show you right now.
Update: We've recently found what has got to be the easiest root method ever. No cords, no computers—just download one app directly to your S3, regardless of carrier, and you'll be rooted in less than a minute. Check out the guide here.
Step 1: Download Motochopper on Your Mac
To gain root, we'll be using Motochopper, so go ahead and download it and save it to your Mac's desktop.
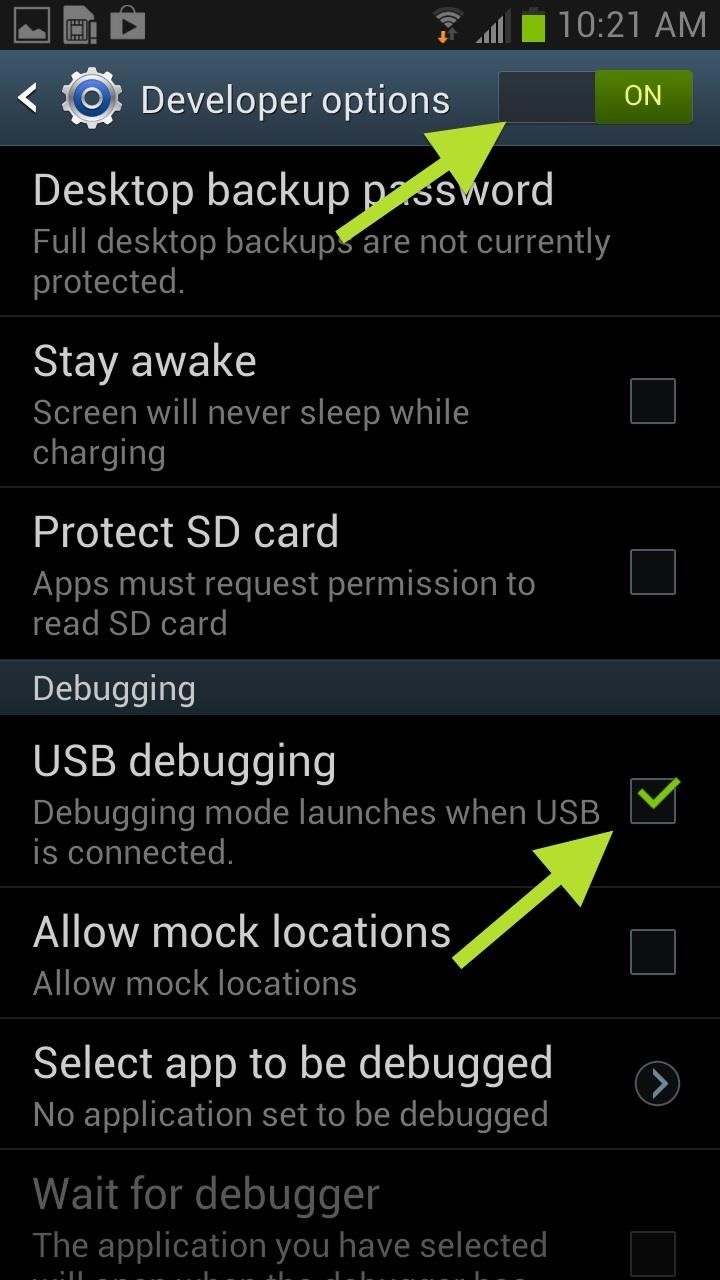
Step 2: Enable USB Debugging on Your GS3
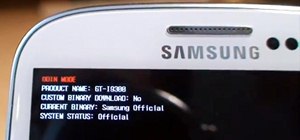
Now, on your GS3, you'll need to enable USB Debugging so we can connect the device to the Mac. You can do this by going to Menu -> Settings -> Developer Options and make Developer Options is turned ON (if not already). Then make sure the box next to USB Debugging is checked.
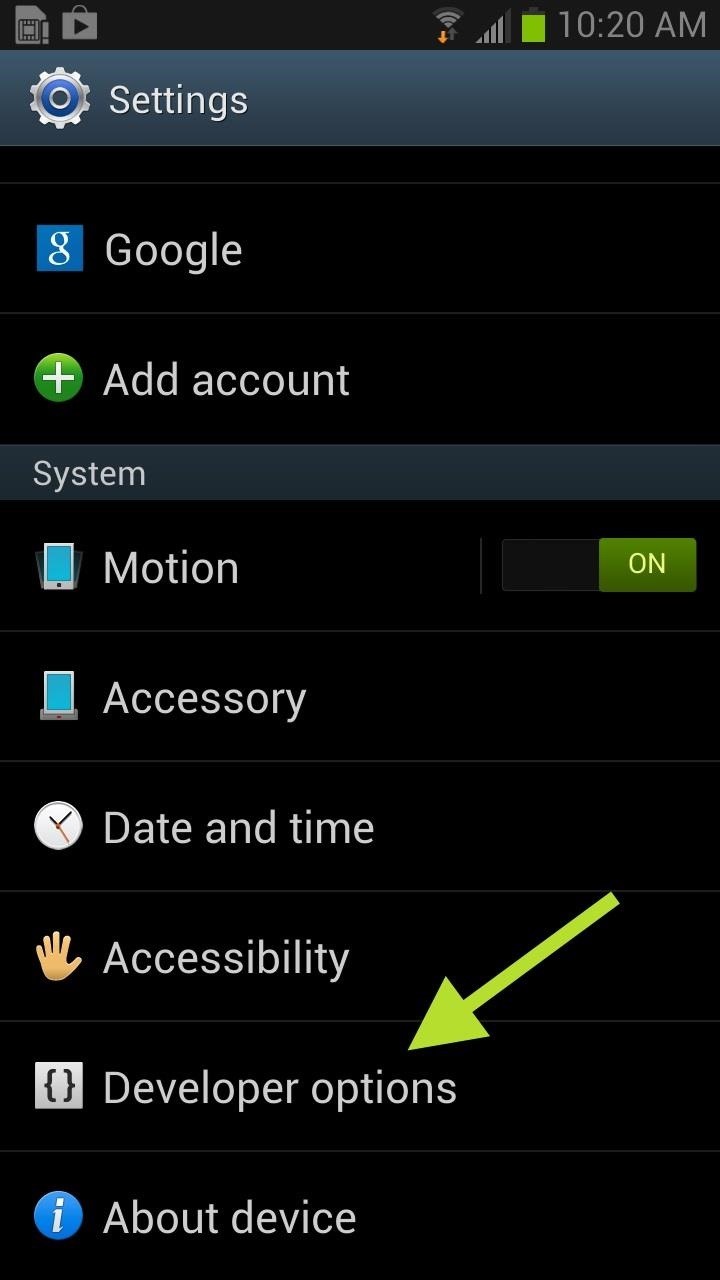
If you do not see Developer Options at first, go to About device and tap on Build number until it says You are now a developer.
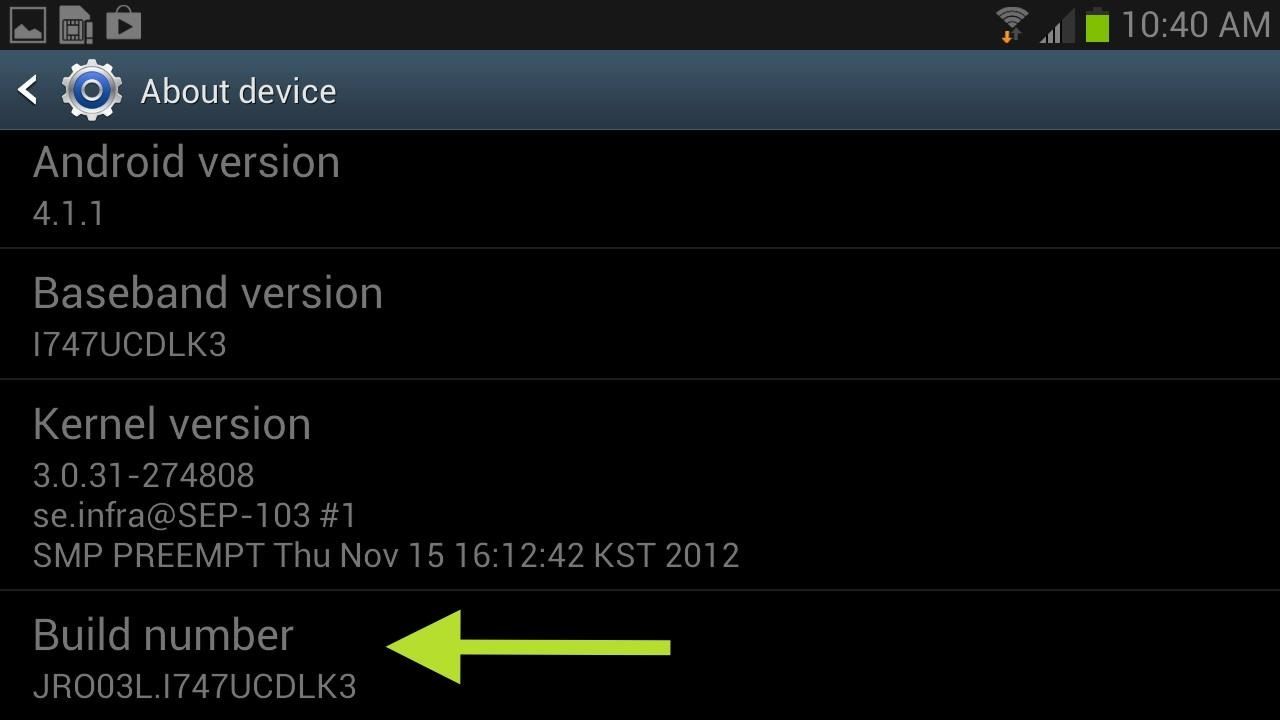
Then you'll have access to the Developer Options.
Step 3: Make Sure Your Have a Password on Your Mac
Now that you have Developer Options and USB Debugging turned on, you can connect your device to your Mac. If you do not have a password for your computer, you must set one up before proceeding. You'll need this password to root your phone, plus you should have a password on your computer anyway.
Step 4: Open Up Terminal on Your Mac
Open a Terminal window and type in each of the following commands individually followed by the Enter (Return) key—one after the other:
- cd Desktop
- cd motochopper
- chmod 755 *
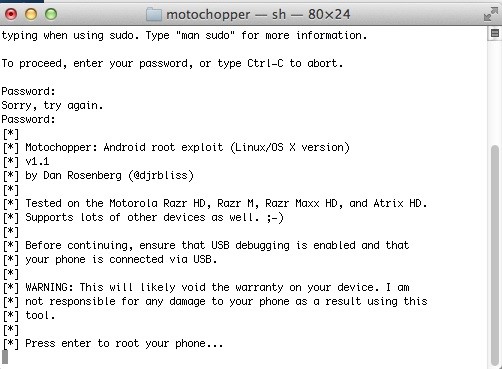
- sudo sh run.sh
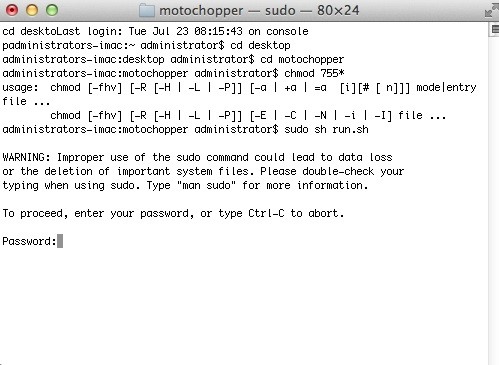
When you press Enter on that last command, you'll see the warning pictured above, and then will need to enter in your password. Do so and press Enter afterward.
This Is Where Motochopper Comes In
After you submitted your admin password, Motochopper will begin running the exploit. It should look like so:
Step 5: Root Your GS3 with Motochopper on Your Mac
When it finishes loading the initial Motochopper dialog screen, press Enter once more to root your GS3. This process should take maybe one or two minutes.
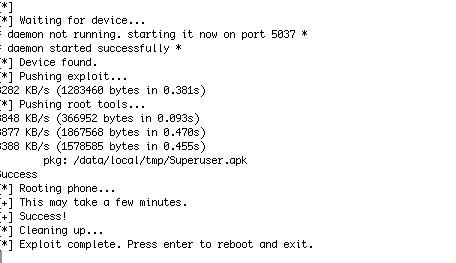
Once completed, press Enter (last time, I swear) and your GS3 should automatically reboot.
Step 6: Become a Superuser
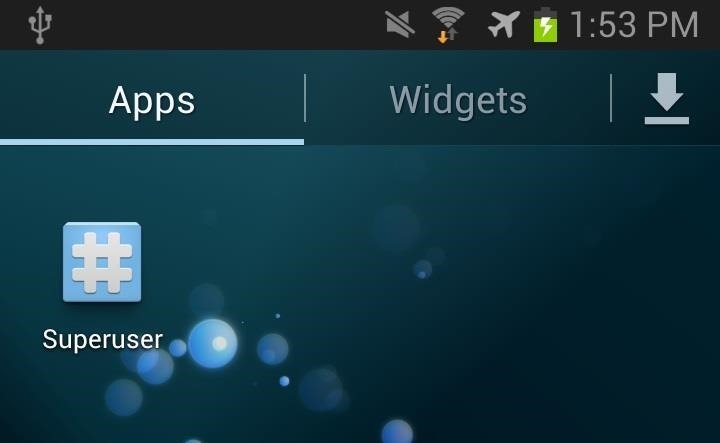
If your root was successful, you should see the Superuser icon on your home screen and in the app drawer.
To make sure everything is legit, go to the Google Play Store and try a root-friendly app like Internet Speed Master. If it gives a Superuser request, then all is well. You have just rooted your Samsung Galaxy S3.
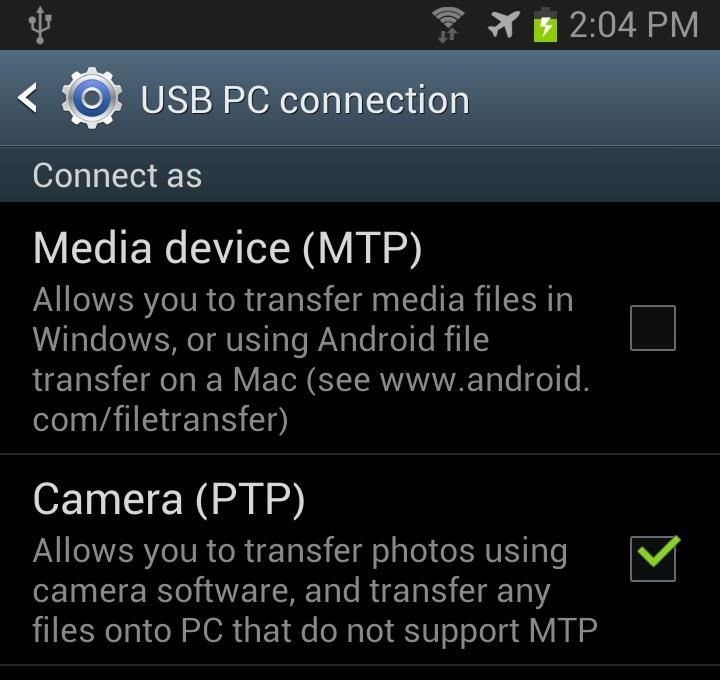
BONUS TIP: Transferring Files on Your Mac
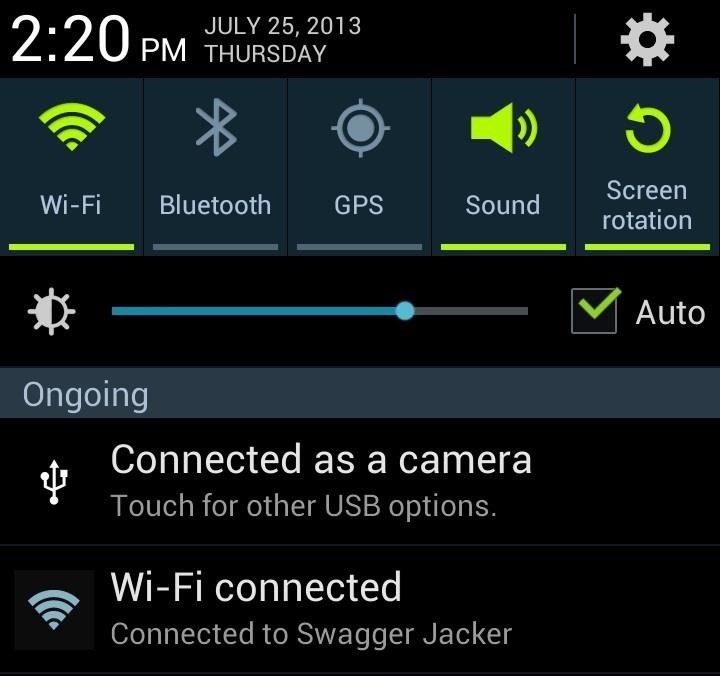
While you can transfer photos by connecting your device via the USB cord, it's unnecessarily complicated on a Mac. You'll need to pull down the Notification tray and select the USB options under Ongoing, and then select Camera (PTP). Now, unplug and plug your device back in. Apple's iPhoto—or whatever photo manager you have defaulted—will open up.
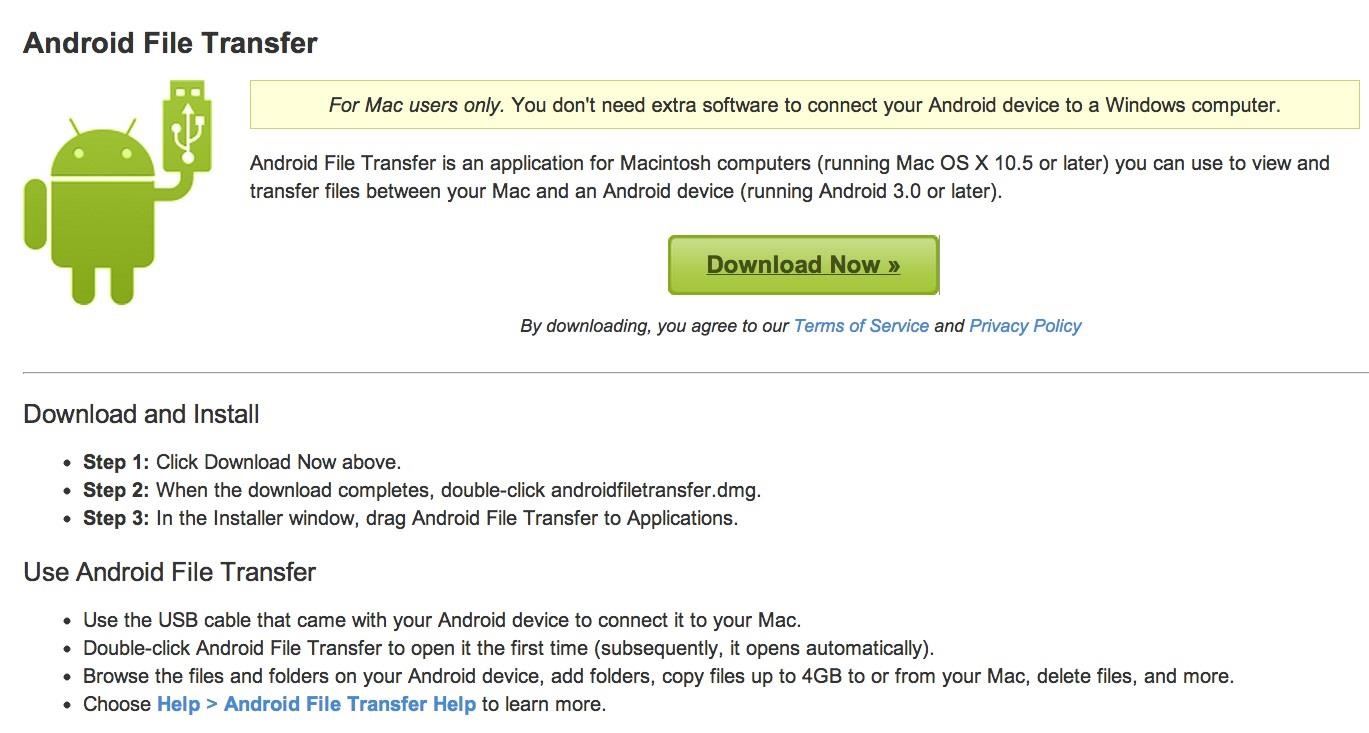
Now, if you want to transfer files and media (Media device MTP), you will need to download Android File Transfer (AFT).
Once downloaded, drag it to your Applications folder, as you would any other Mac app.
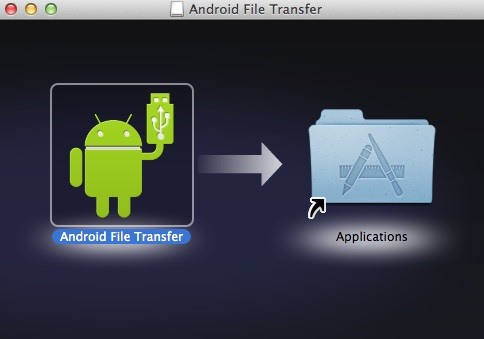
Open up AFT from the Applications menu and connect your device. Or, connect your device and open up AFT. It doesn't matter.

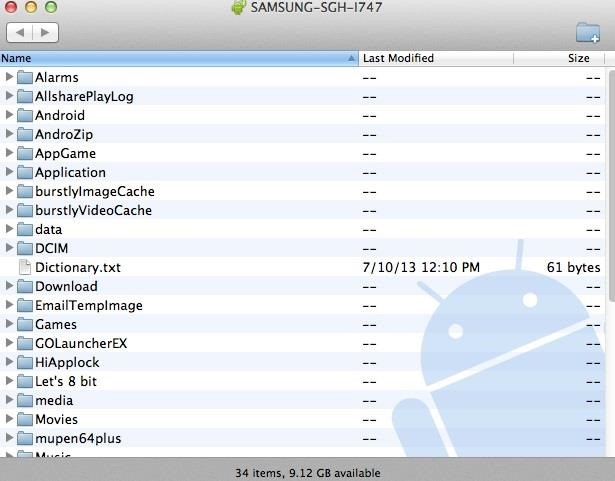
Click on Get started and you should finally see all of your GS3's files and folders. Now you can easily drag and drop files from your GS3 onto your Mac, or vice versa.
That's It
Hope this guide helped you out. If you ran into any problems, be sure to ask below in the comments, or hit up the GS3 softModder forum for help.
Just updated your iPhone? You'll find new emoji, enhanced security, podcast transcripts, Apple Cash virtual numbers, and other useful features. There are even new additions hidden within Safari. Find out what's new and changed on your iPhone with the iOS 17.4 update.


6 Comments
What if I keep getting "device not found" in Terminal?
This is my 2nd root attempt. It worked easily the first time, and I won't bore you with the afterwards, but I ended up resetting my phone. I would like to root again, if possible.
Im new to rooting .I use a galaxy s iii and i followed the steps without success.My terminal before "Cleanig up" says "Failure".Being noob i tried to do the same method second time without results.What should i do now?Any thoughts? Thanks in advance...
I tried this on a Galaxy s3 Mini: Android 4.1.2. when opening superuser it says su must be updated, please chose an installation method. (neither work) so must cancel. How do i update the su? please and thanks.
* Rooting phone...
Bus error /data/local/tmp/pwn
* Cleaning up...
* Exploit complete. Press enter to reboot and exit.
Has anyone attempted to use this exploit on an S3 I747m with KitKat software?
in the terminal , this happened:
"
pkg: /data/local/tmp/Superuser.apk
Success
* Rooting phone...
Cleaning up...
"
Samsung Galaxy S3 Mini
Model GT-I8190
Android 4.1.2
Share Your Thoughts